How to Snowboard: The Definitive Guide
Learn how to snowboard with this definitive guide, perfect for beginners and everyone else.
We stopped on the side of the slope in a clearly visible spot (safety first!) when my father said to me, “You’re still five years younger than I was when I started snowboarding.”
He started snowboarding at 47 years old, and during the last 20 years, snowboarding has taken him to places like New Zealand and the National Geographic YouTube channel:
What is it about snowboarding that can change your whole life? How can sliding down a hill on a piece of wood become a lifelong passion?
In this guide, we will take an in-depth look at snowboarding. Whether you are a beginner or already have some experience, we will equip you with valuable knowledge and practical tips to help you on your snowboarding journey.
The key ingredients of snowboarding
There is much more to snowboarding than we realize when we watch someone riding down the slope.
Snowboarding can resonate with the geek inside us because it involves gadgets, requires a systematic approach to progress, and offers a lot of satisfaction and fun.
Set up
First, we need to choose and set up our snowboard equipment. Modern snowboarding offers many new technologies and countless variations to review and decide upon.
Everyone loves getting new stuff — new gear to play with, comparing it to the old, and looking for any little impact it can have on our experience and performance.

Progress
Snowboarding is a very technical sport. Even when you master the basics, there are many paths for progression and many things to learn.
Don’t get comfortable with what you already know; you’ll miss the satisfaction that comes from learning new things.
Of course, sometimes you can feel frustrated if things aren’t going as you’d wish. This should motivate you rather than paralyze you.
Have fun
Combine your carefully selected setup with your progress challenges and have endless fun on the slope.
Your way of riding creates your unique expression and experiences. Laid down carve. Surfing pow. Feel of the stomped trick. Riding with friends. You and the mountain.
Introduction to snowboarding
Snowboarding history
If we look for the roots of snowboarding, there probably isn’t an older documented case than the tradition of riding boards in the village of Petran, Turkey. They have been snowboarding for over 300 years, as the following excellent film documents.
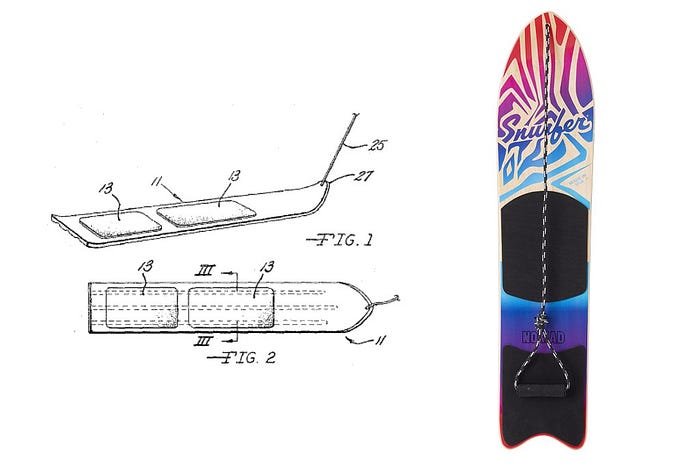
There isn’t any evidence that Petran snowboarding influenced the development of modern snowboarding. Independently, but not unlikely in result, its origins date back to the early 1960s in the USA when Sherman Poppen created a snowboard predecessor, the “snurfer.” As the name suggests, it was inspired by surfing.
Check out History of Snowboarding if you are interested in how snowboarding has boomed (and then down-turned) since then.
Snowboarding styles
Snowboarding boots define the major difference between snowboarding styles.
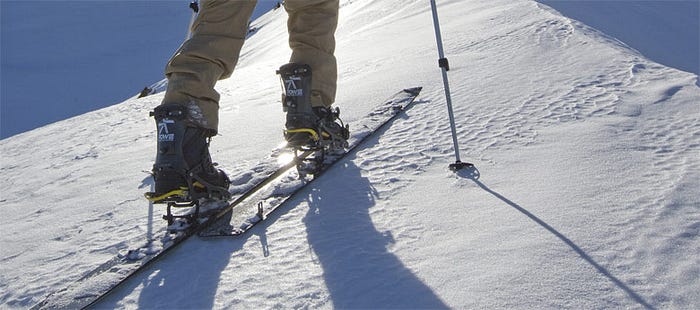
Hardboots
Hardshell, ski-like boots, are associated with alpine snowboarding and carving. They are also used in racing and parallel slalom. Alpine snowboards are typically narrower and longer, with a stance that uses large positive angles.
Softboots
Riding in soft boots is the most common way of recreational snowboarding, and unless you know exactly what you’re doing, we recommend starting in them, too.
The rest of this guide will focus on riding in soft boots, as it’s the most versatile form of snowboarding. You can use soft boots for all different snowboarding styles like carving, freestyle, and freeride. We will inspect these styles in the “Where to Progress” section.
Softboots are a synonym for freedom associated with snowboarding - walking freely, without heavy skis and clumsy poles.
(However, don't quote me the next time you have to unstrap on a flat area while your friend on skis easily overtakes you using their poles.)
Snowboarding equipment
Correctly choosing and setting up snowboard equipment can significantly improve your experience and accelerate your progress. That’s why we explain some key features here in this section.
Proper snowboard equipment can make or break your day on the mountain.
Snowboard
Snowboard types have evolved a lot in the last decade. Three key characteristics define how a snowboard rides:
- profile
- shape
- flex
Profile
Snowboard profile refers to how a snowboard looks when you view it from the side.
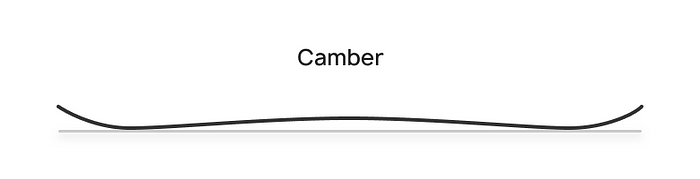
The center of the snowboard with a camber profile is elevated, which creates greater pressure on the contact points (the points where the snowboard touches the ground) when you stand on the board. The result is a more stable ride, more pop for ollies, and better rebound in turns.
However, it’s easier to catch an edge on it, and it doesn’t float as well in powder.
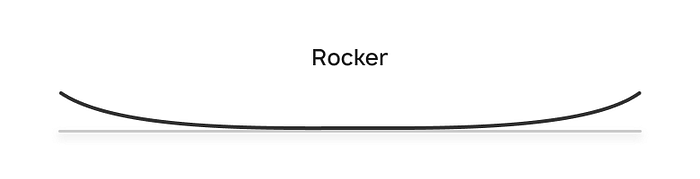
Rocker snowboards have reversed camber profiles, which float better in powder. They are also usually easier to press when doing butter tricks. Rocker boards are more forgiving, so you are less likely to catch an edge on them, especially if you are a beginner. However, their edge hold is not as good as that of camber boards.
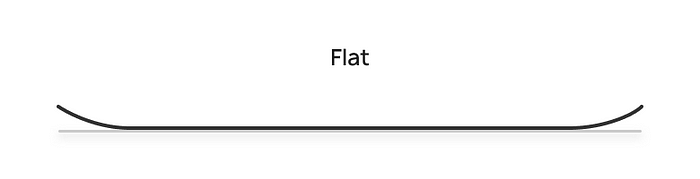
Flat snowboards are entirely flat when lying on the ground. You can use them for a variety of riding styles, and they are particularly well-suited for park riding.
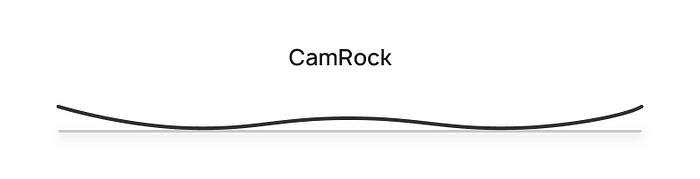
Hybrid profiles combine camber and rocker in specific ways. For example, CamRock uses camber under the feet for better stability and pop, and rocker at the nose and tail for a more catch-free ride and float in powder. Another variation is RockCam, which features a rocker between the feet and camber under the bindings.
There are other profiles, such as the powder-specific S Rocker. For more information on camber profiles, check out this BoardWorld post.
Shape
Snowboard shape specifies how it looks when viewed from the top.
A snowboard with a twin shape has the same nose and tail, allowing it to ride equally well in both directions. This makes it a good choice if you want to learn to ride switch or do freestyle tricks where you often land switch.
Directional snowboards typically have a tapered shape with a wider nose and a narrower tail. They ride better in one direction and float better in powder.
The directional twin has the same shape for the nose and tail; however, the flex is stiffer in the tail.
Check out this Whitelines video for more information on snowboard shapes.
Flex
Flex defines how stiff the snowboard is. It is usually rated on a 1 to 10 scale, with 1 being the softest and 10 being the stiffest, with most models falling into the 3–7 range.
We typically use stiffer boards for freeriding and carving, while softer ones are preferred for freestyle.
Snowboard categories
Based on profile, shape, and flex, we can sort snowboards into the following categories:
- All-Mountain Freestyle: Twin or directional twin snowboards with medium flex, focusing on freestyle riding all over the mountain.
- All-Mountain Freeride: Directional snowboards with stiffer flex, sometimes with a tapered shape, camber profile, or hybrid profile for added powder capabilities.
- Park Snowboards: Twin snowboards with soft to medium flex, featuring camber, rocker, flat, or hybrid profiles. Stiffer boards with camber are used for bigger jumps and pipe riding.
- Powder Specific: Directional snowboards with an S-rocker, a tapered shape with a wider nose, and a shorter, narrow tail (a swallowtail).
- Volume-Shifted Boards: A relatively new category of snowboards that are wider and shorter, with various shapes and profiles. The extra width increases the board’s float in powder and reduces the probability of boot-out when carving (see below).
How to buy a snowboard
Check out the following video on how to find the perfect board for you:
If you are a beginner, you might look for the following characteristics:
- Flat or mellow camber between the feet for better stability, with rocker towards the nose and tail for a more forgiving, catch-free ride (CamRock profile, see above).
- Medium flex (5).
- In the middle of the recommended weight range (don’t choose your snowboard based on your height).
- If you are a man with a 10.5+ US boot size, consider mid-wide boards with a width around 260mm+ to avoid toe or heel drag.
- Lower price point.
Check out the best beginner snowboard picks and learn how to choose the right size snowboard.
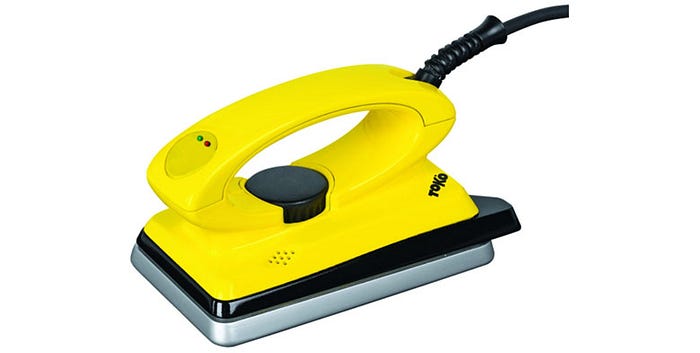
Stomp pad
A stomp pad is a piece of foam or plastic that you can glue to your board between the bindings. It will help you ride your board with one foot strapped in, such as when you get on and off the lift.

Stickers
Stickers are a great way to show creative expression or preference for specific brands. However, avoid an extensive sticker job on your snowboard if you are a beginner. You probably don’t want to attract more attention than necessary when you’re still struggling with the basics.
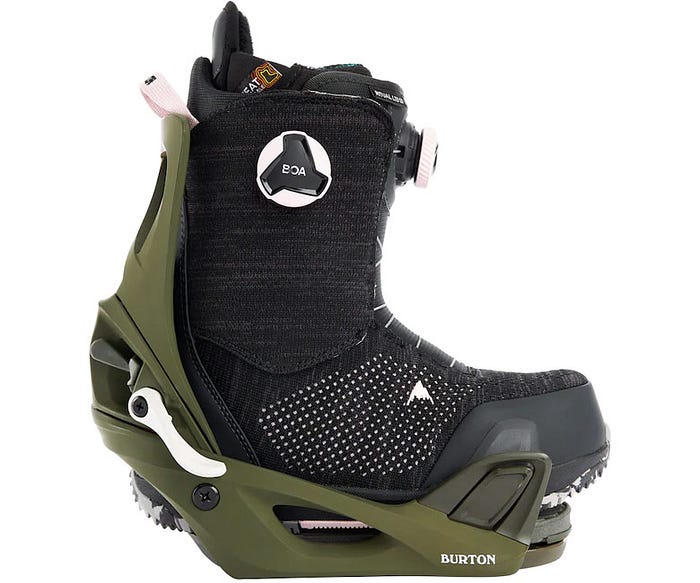
Boots
Although we call them soft boots, snowboarding boots differ by flex:
- Soft to mid-flex boots are more suitable for beginners and freestyle snowboarding because they allow more flexibility for tricks.
- Hard flex boots are a better choice for advanced riders and freeriding because they more accurately translate movement to the binding and snowboard.
Lacing systems
Another essential difference between boots is the lacing system. There are three main types of lacing systems:
- traditional laces
- speed lacing
- boa systems
Check out the How to choose snowboard boots guide by Tactics for more information.
Boot fit
A proper boot fit is crucial for your comfort and performance on the snowboard. Snowboard boots should be snug, with your toes lightly touching the front of the inner liner when you stand straight. Your toes will move backward a bit when you stand in the snowboard stance, and your heels should stay locked in place.
Don’t forget to try out the boots with the socks you will use for riding. If your shop offers the option, have your boots heat-molded after the purchase.
Check out the following guide for more information.
If you’re struggling with getting properly fitted boots, you can also look for advice in the Snowboarding Forum.
Bindings
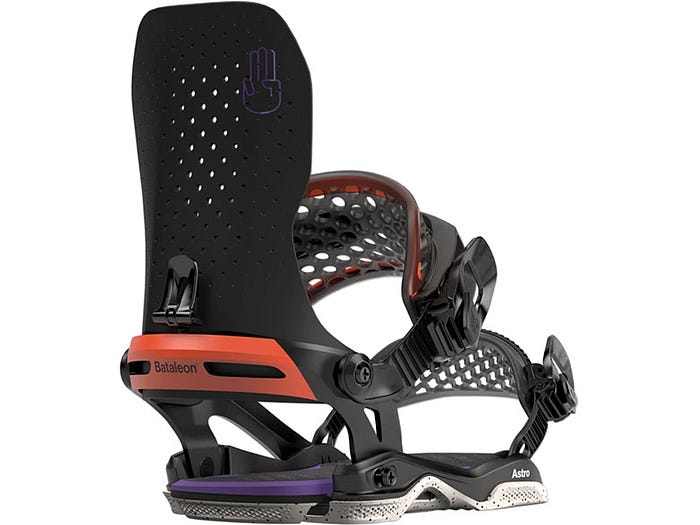
Similarly to snowboards, we can categorize bindings according to their intended use into all-mountain, freestyle, and freeride categories. Freestyle bindings are typically softer, freeride bindings are stiffer, and the all-mountain category falls in between.
Because snowboarding bindings translate movements from your boots to the snowboard, they must fit your boots well. You can find bindings in different sizes (typically S/M, L/XL). Check the manufacturer’s sizing chart for the correct binding size for your boots.
Note: If you are buying Burton bindings, be aware not to buy the EST version if you don’t have a snowboard with the EST channel.
The latest development in binding technology is Burton’s Step On, which removes the necessity of strapping in and out of the bindings.
Binding Setup
Setting up bindings means:
- Customizing the binding so it fits your boot well (e.g., length of straps).
- Adjusting your baseplate length to support your boot’s sole (your boot should have some toe and heel overhang, but not too much).
- Mounting the bindings on your snowboard with your preferred angles so your boots are centered over the board.
Check out these videos for more details on binding setup.
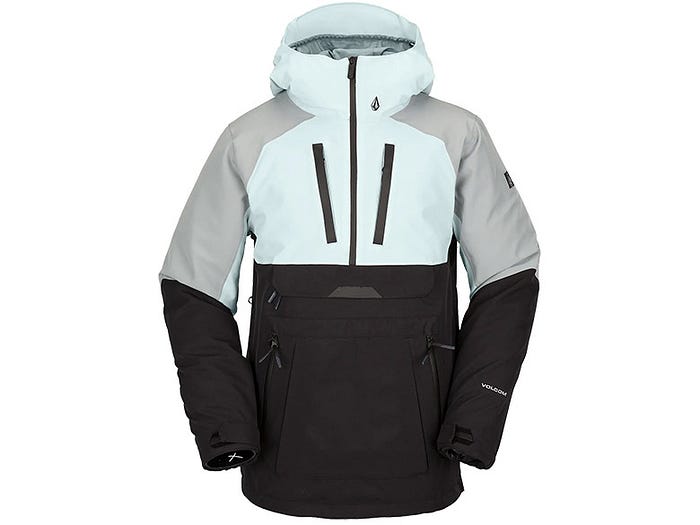
Clothing
Jacket and pants
A jacket and pants as top layers protect you from the elements, so focus on solid waterproofing. For resort riding, 10k waterproofing and breathability should be sufficient unless you live in a wet climate. For freeriding, opt for 20k and up (GORE-TEX®, eVent™, and other materials) if your budget allows it.
A suitable compromise for resort riding is light insulation in the jacket. Technical, non-insulated jackets are a better choice for freeriding.
As a beginner, you may sit on the ground more often, so pay attention to choosing quality pants.
Snowboarding jackets should have a powder skirt inside, which prevents snow from getting to your waist, and you can attach it to your pants. Volcom offers a patented jacket-to-pant zip feature.
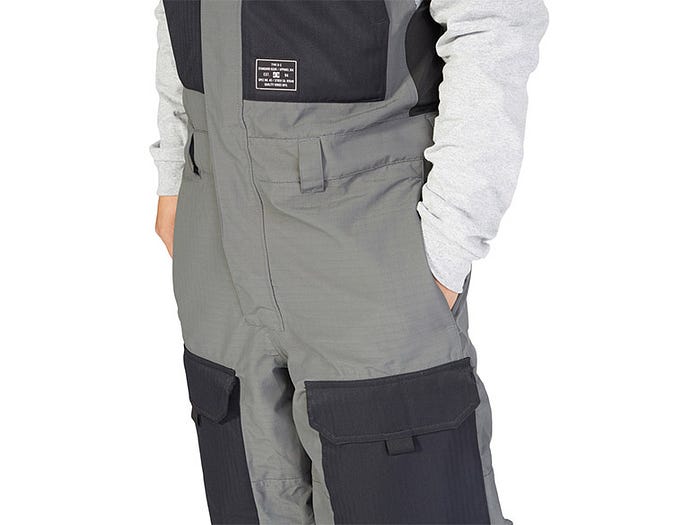
An alternative is bib pants, which protect against snow and allow free movement of the waist.
Jackets and pants usually come in three styles:
- loose fit
- standard fit
- slim fit
Choose the fit you like, but ensure that any protective gear you use fits underneath. As a beginner, pick a standard or loose fit for freedom of movement. What can feel baggy and oversized off the slope doesn’t feel as much when riding. This is especially true for pants, which need relatively big leg openings to fit over the boots. Also, ensure that your pants are long enough even when squatting.
Check out Evo’s guide on outerwear fit.
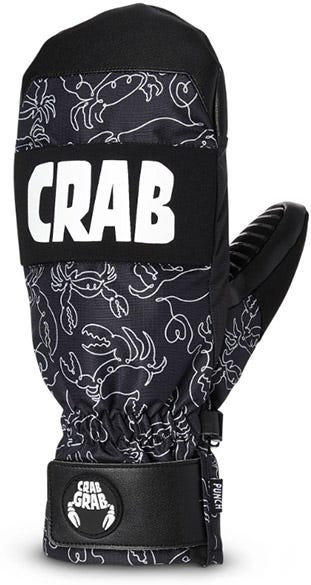
Gloves
For hand protection, you have two options: mitts and gloves. Mitts are more popular among snowboarders because they keep your hands warmer. However, they may make it harder to operate things like zippers or binding buckles.
Ensure that your gloves are easy to take off and put on, especially if you plan to use wrist protection. If they go under your jacket sleeve, make sure your sleeve has enough room to fit them comfortably.
Base and mid layers
The base layer should be made from a functional material to keep you warm and dry. You can try a one-piece bottom layer for extra warmth.
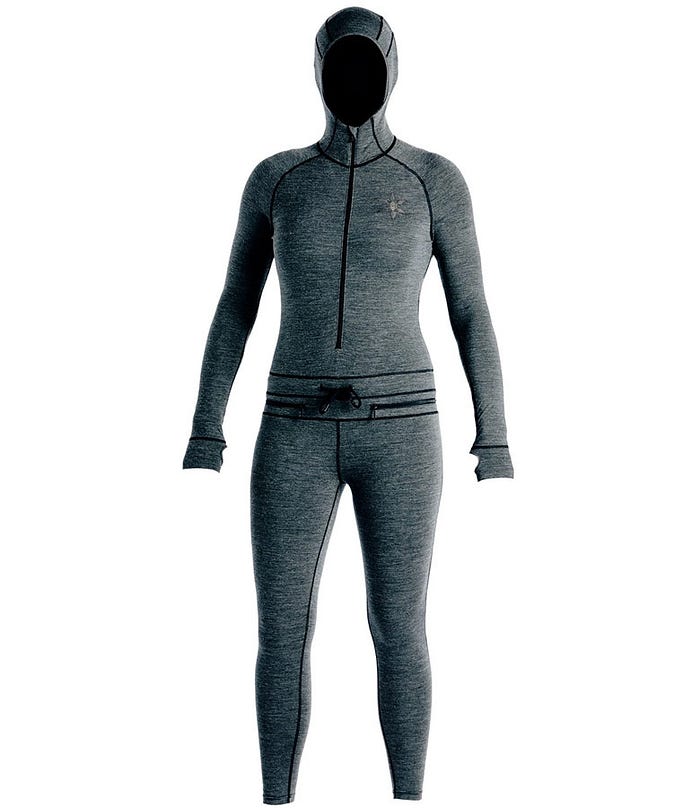
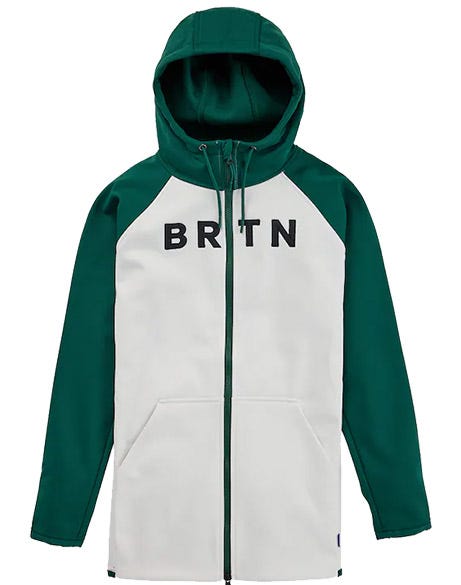
Depending on your jacket insulation, you can add a hoodie or an inner-layer jacket for additional warmth.
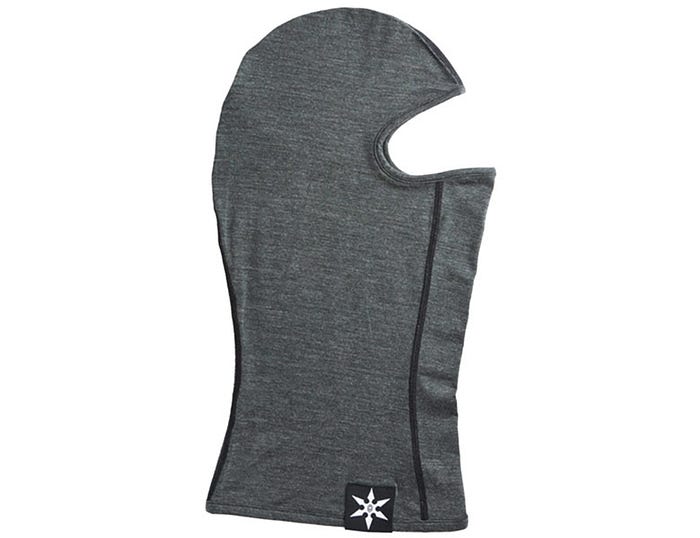
Facemask
A facemask, balaclava, or neck warmer is a must-have on the snowboard. These accessories will keep snow and wind out of your face and neck.
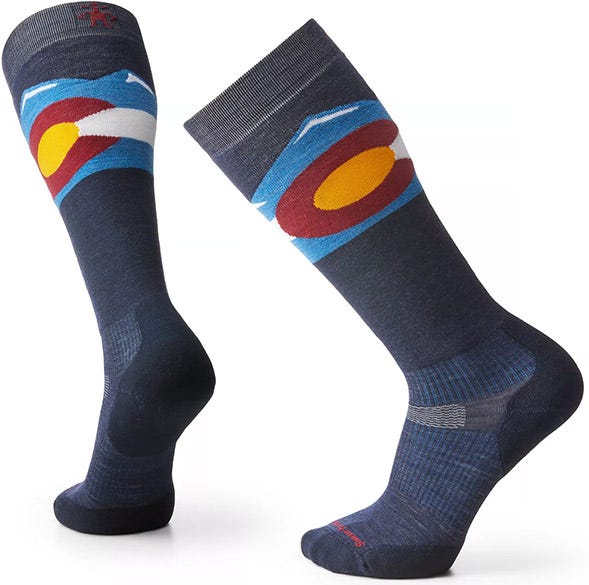
Socks
Thinner socks can keep your feet warmer than thick socks, which can pack up in the boots and reduce blood circulation. Choose socks made from synthetic materials or wool (such as Merino wool), which stays warm even when wet.
Protection
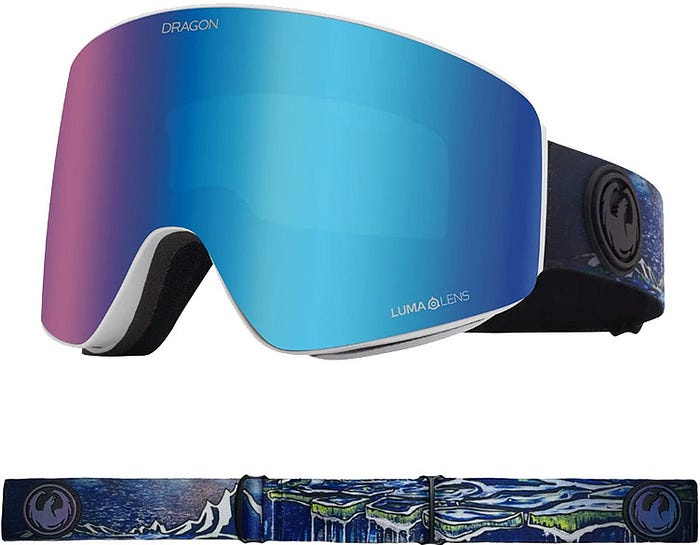
Goggles
Goggles should offer good peripheral vision and fit your face comfortably. You can often buy goggles with two pairs of lenses — one for low light conditions and another for sunny days.
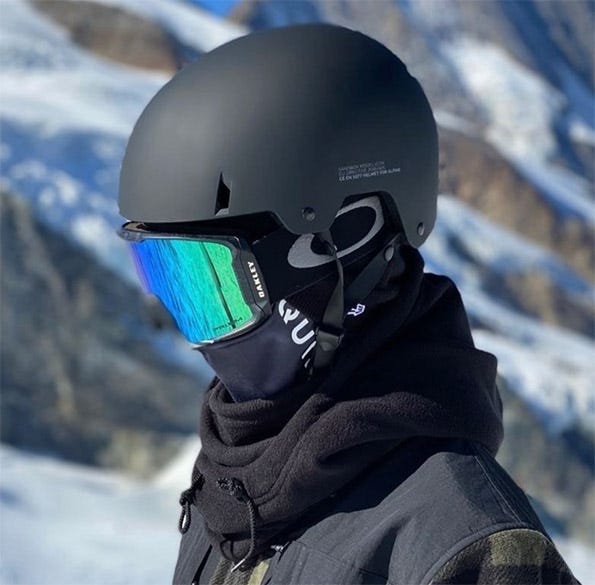
Helmet
A helmet is a must-have for a beginner on a snowboard. Catching an edge is one of the most common reasons for falling, and slamming your head against the snow is not fun.
If you don’t like the look of a helmet, consider wearing your goggles under the helmet for a more stylish appearance. Avoid a big gap between the goggles and the helmet.
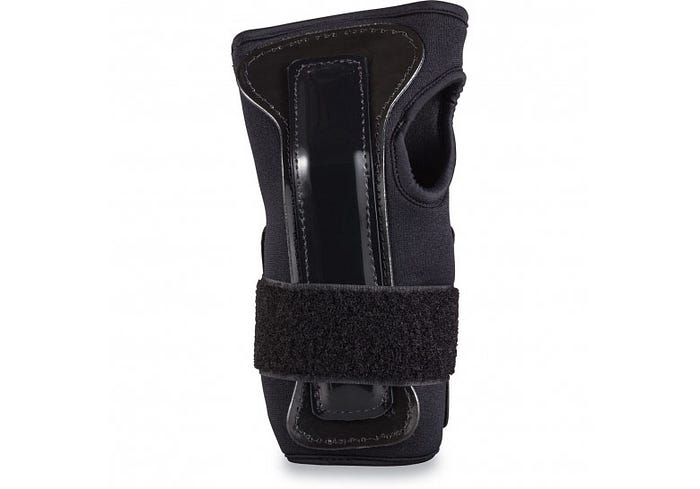
Wrist guards
Wrist injuries are pretty common among snowboarders. When you fall, you instinctively try to reduce the impact by using your hands. Instead, try to spread out the impact by using your forearms (see the “Common Mistakes” section for more details).
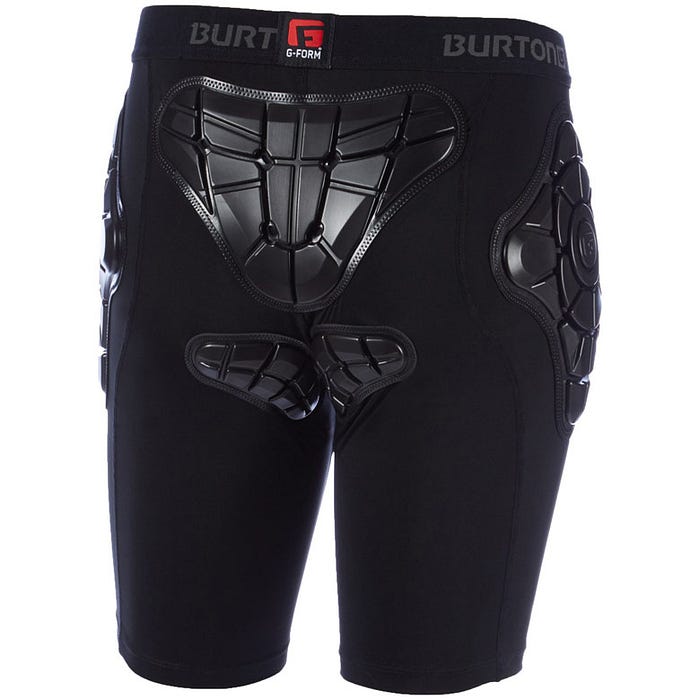
Impact shorts
Impact shorts can come in handy, especially at the beginning when you sit on the snow more often and falls on the tailbone are more common.
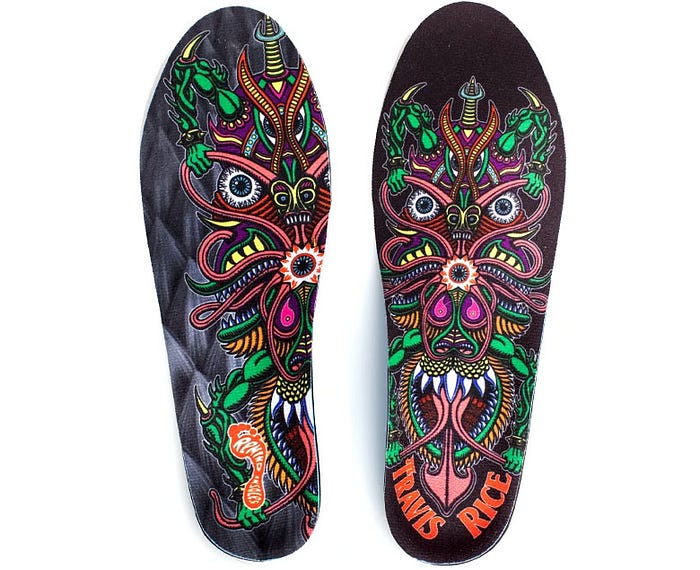
Boot insoles
If you want to protect your knees in the long run, consider buying aftermarket insoles with impact reduction.
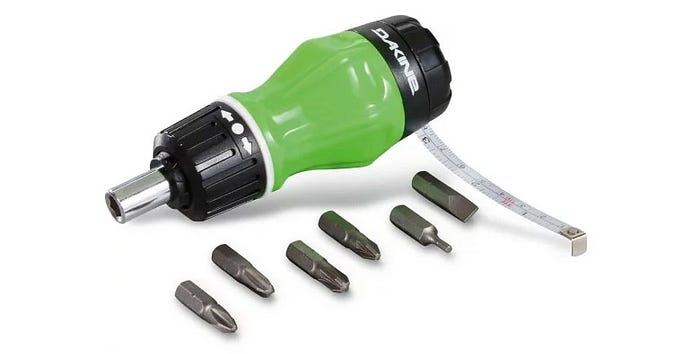
Accessories

Learn how to snowboard
Now that you have everything you need, it's time to learn to snowboard.
Lessons or Self-Learning?
First, we recommend that you take lessons to learn how to snowboard. An experienced snowboarding instructor can make your learning process effective and safe. However, if you don’t want to or cannot take lessons, this section explains the typical process of learning how to snowboard.
Even if you are about to take lessons, it’s useful to understand how the process works so you can follow along more easily and train on your own after the lessons.
Finding your stance
First, determine which foot is dominant — whether you are regular, riding with your left foot forward, or goofy, riding with your right foot forward. Check out the following video for some tips on how to do it:
Set up your snowboard
If you haven’t already, mount the bindings on your snowboard. Two variables come into play here:
- Stance Width: It should feel comfortable and stable, allowing you to squat. It should be slightly wider than your shoulders.
- Binding Angles: The most common stance on a snowboard is a “duck stance.” Your front binding has a positive angle, and the rear binding has a negative one. This will allow you to ride more comfortably in the switch (with your opposite leg forward). It’s common to set up the front binding with a slightly larger angle on the front foot, e.g., +12/-9 or +18/-12, but for the beginning, you can set up equal angles.
The painful truth about snowboarding beginnings
Most falls in snowboarding, especially for beginners, are caused by catching the edge. When your edge digs into the snow, your snowboard stops, and the inertial force slams you to the ground. This can hurt!
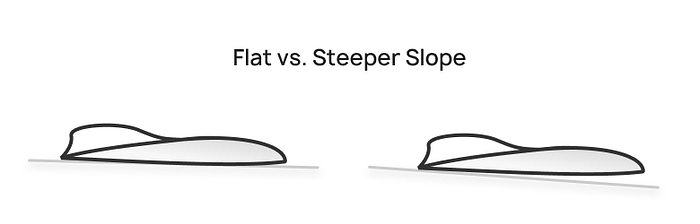
Many beginners learn to snowboard in circumstances that are very prone to catching the edge — on flat slopes.
On a flat slope, the edge opposite the one you are trying to ride on is naturally very close to the ground and prone to digging into the snow, particularly because you haven’t yet developed good control over the edges.
You can minimize the risk of catching an edge in two ways:
- Practice your first moves on the snowboard with just one foot attached. See the QuickRide system below.
- Practice side-slipping with both feet attached on a slightly steeper slope where the opposite edge is further from the snow. This has two advantages:
- A bigger margin for error
- The board slides easier on a steeper slope
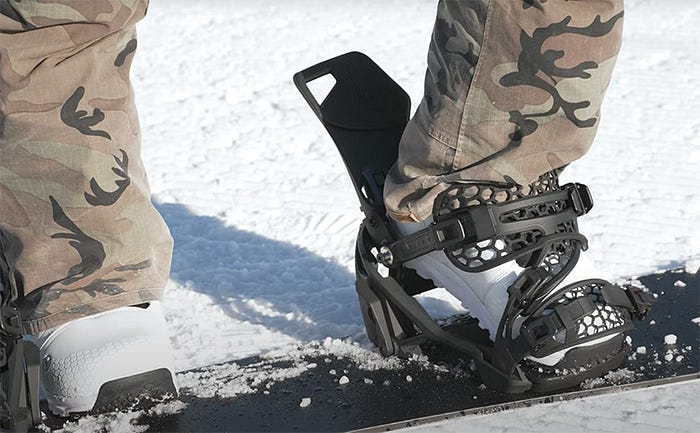
CASI QuickRide system
The best way to demonstrate a typical learning process is through CASI’s QuickRide System.
QuickRide is a system used for teaching snowboarding by CASI, Canadian Association of Snowboard Instructors. It’s the product of 20 years of experience, innovation, and refinement, providing the most comprehensive and fastest way to learn to snowboard.
Contrary to what you might expect, you will spend much time practicing with just the front foot attached to the snowboard in the initial lessons. This allows you to step away from the board if you are about to fall or catch an edge.
You can get familiar with QuickRide’s basic principles in this video.
The progression steps in the QuickRide system are:
Basics
This step aims to get familiar with your snowboard and become comfortable moving around with one leg attached. You start by practicing in a flat area, trying out how the snowboard slides and how it feels to stand on it in a neutral, balanced position.
Next, you progress to skating, climbing, and descending with one leg attached. These skills are handy for moving around with your snowboard and getting on and off the lifts.
Sliding
The goal of the sliding step is to become comfortable on the snowboard while it slides. You start in a flat area, pushing with one leg and then putting the other leg on the snowboard. Next, you progress to sliding on the snowboard on a flat slope.
Finally, you practice turning the snowboard with toe and heel drag and J-turns, still with just one foot attached.
Control
In the third step, you learn to control speed and direction with both feet attached to the snowboard.
First, you try side-slipping with one foot attached and changing direction this way. Then it’s time to attach the board to both feet for the first time. You learn how to create a platform in the snow, so you don’t have to sit down when strapping into your bindings.
Next, you practice side-slipping and the pendulum on the heel and toe edge (notice the steeper slope in the video).
Turning
The turning step aims to teach you how to turn by changing edges in the fall line. This includes exercises like garlands, J-turns, and beginner turns.
Flow
In the last step of the QuickRide system, you will learn to explore the mountains safely. You will improve your turns by adding a traverse between them and learn how to flex and extend your position to better absorb terrain and control your speed.
Other tutorials
You can also check out these other tutorials.
How to Snowboard: A Beginner's Guide by PSIA-AASI
How to Snowboard with Real Beginners by Malcolm Moore
Common mistakes and how to avoid them
Around 60–70% of recreational snowboarders don’t ride with proper technique. Your observations may vary depending on where you ride. This can result from not taking lessons or not understanding the correct technique. It’s very easy to develop bad habits, which may be hard to eliminate. Check out the most common mistakes and how to avoid them.
Unbalanced position
The following Snowboard Addiction video explains a balanced position and how to practice it.
Straight legs
The next video discusses another common problem — straight legs.
Turning with counter rotation
Turning with counter rotation is one of the common mistakes beginners and intermediate snowboarders make:
Counter-rotation is important in snowboarding, but you need to use it for the right purpose, such as speed checks or in freestyle, where it’s a part of many tricks.
Riding on a flat base
Riding on a flat base means that you don’t apply any pressure to any of your edges, and your snowboard rides just on its base. It’s very easy to catch an edge in such a situation. Always apply slight pressure on one edge, even when riding down the fall line on cat tracks.
You only ride on a flat base when switching from edge to edge during turns or in powder. You also ride flat base on boxes when doing freestyle tricks or training for them on the snow.
Falling on hands
One of the most common injuries in snowboarding is wrist injuries. Learn how to fall properly by spreading out the impact.
How to improve your riding
Snowboard Addiction has another great video summarizing all common mistakes and tips on how to improve your riding.
Snowboarding etiquette
Snowboarders have earned a poor reputation among skiers over the years — they often see us as those who sit in the middle of the slope. Maybe you don’t care what skiers think, but try to avoid doing this for your and others’ safety. If you need to stop, do so on the side of the track where other people can see you. Never stop behind a lip or in places where others cannot see you.
Get familiar with the rules of the resort where you are riding. Not only will they help you ride more safely, but it’s also good to know them when something happens, and people argue about whose fault it was.
Use your common sense and look beyond the rules.
It’s a general rule that the skier or rider behind you is responsible for safely passing you. However, you invite trouble if you are doing wide-open carving turns without looking uphill. It’s better to be safe than sorry — always look uphill when crossing the slope to avoid being hit by someone coming down fast. It’s easier to look uphill when you are on your toe edge. Learn to peek over your shoulder when on the heel edge.
For more info, check out What Are The Basic Rules Of Snowboarding?
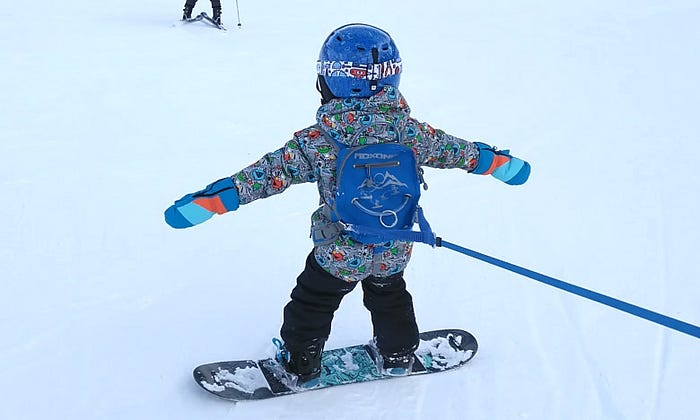
How to teach children to snowboard
Although you might have seen YouTube videos of 2 or 3-year-old children snowboarding, snowboarding is harder to grasp for an average child than skiing. While with skis, a child can move their feet freely and only needs to understand two relatively simple concepts (pizza / french fries), the sideways movement and balance involved in snowboarding are not as natural for small kids. This is partially because their center of mass is shifted towards their head until about the age of 8.
Like anything related to sports in small children, play and fun are key. It’s more about the experience than the technique. Children cannot develop the refinement of the same skills as adults until around age 12, anyway. As snowboarding represents a one-way load on the body, it’s important to avoid overdoing it at a young age and devote enough time to compensatory exercises or free play, which best develops essential motor skills in children.
One way to experience the mountains safely with your smaller children on a snowboard is by using an MDXONE snowboard harness approved by CASI (Canadian Association of Snowboard Instructors).
Check out the FIS SnowKidz series for more tips on snowboarding with your children.
Where to progress?
There are many areas to progress to after you master snowboarding basics. In this section, we will describe the most common ones.
Adaptive stance
Stance variations can confuse even more experienced riders. You learn to ride in a neutral position aligned with your snowboard. So why do some advanced snowboarders ride with their shoulders open?
Such a position allows you to ride with more speed and control. The following video shows the difference between a neutral and high-speed position.
SBINZ defines the stance scale with three levels:
- basic
- active
- high-performance stance
Master all three and adapt your stance depending on the conditions and riding style. The following videos teach toe and heel side turns using the high-performance stance.
Switch riding
If you took snowboard lessons or followed the QuickRide system, chances are you have already ridden switch — with your opposite leg forward. Being able to ride switch is necessary if you want to progress to freestyle snowboarding because even some basic tricks, like 180s, end in the switch position.
Check out Malcolm Moore’s video on switch riding.
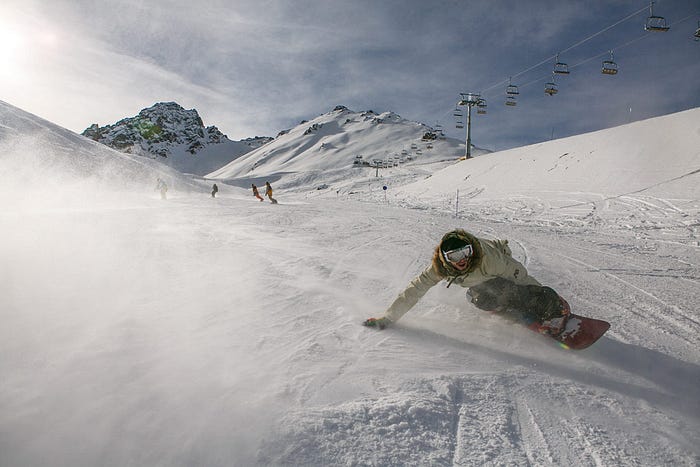
Freeride
Freeride refers to riding your snowboard in free terrain. This can include nearby areas outside the groomed tracks in your local resort, further areas you have to hike to, or extreme terrain in the mountains.
Powder
Freeride snowboarding is mostly associated with riding powder. It’s one of the best feelings you can have on a snowboard and is closely related to snowboarding’s roots in surfing.
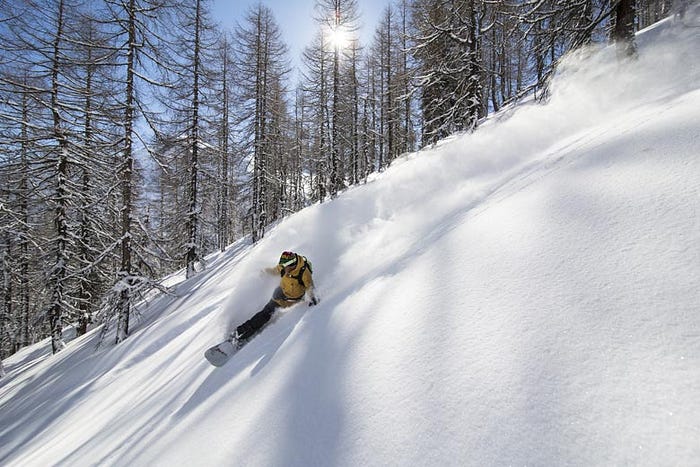
For powder riding, the nose of your snowboard must stay on top of the snow. Depending on your snowboard, this can be easier or harder to achieve.
The easiest way is to ride on a powder-specific snowboard with a wide rocker nose that naturally stays on top of the snow and a narrow, short tail that sinks. If you have a twin snowboard, you need to lean back more, which typically leads to a bigger back leg burn.
The best way to start powder riding is during powder days in resorts, as sometimes there is powder directly on tracks or the nearby terrain is relatively safe for practicing your first powder runs (beware: this doesn’t apply to tree areas, see below).
Advanced freeride
Once you progress to a certain level, you can try more advanced freeriding in the backcountry. You can sometimes reach backcountry areas from the resorts, but they often require a serious hike. Splitboards are popular for this purpose. Commercial services like cat-skiing and heli-skiing are also available.
Safety
Safety is an enormous concern in freeriding due to the risks of avalanches, tree wells, hitting trees, or falling in exposed terrain. Tree wells are especially dangerous, even for beginners, as they can form in the trees within the resort.
Never underestimate such risks. Ensure you have all the required equipment and training, and always follow the instructions of mountain rescue.
If you are interested in advanced freeriding, check out the “How to” series with Xavier de Le Rue.
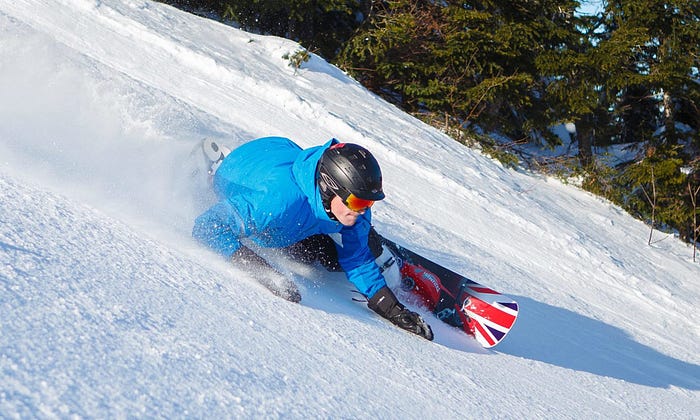
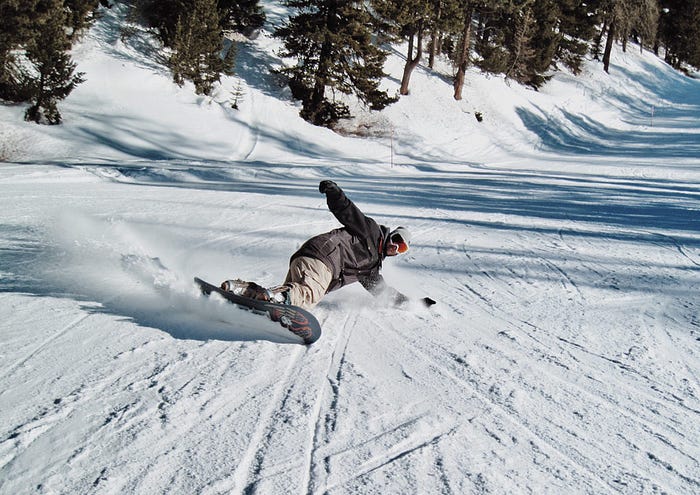
Carving
Carving is experiencing a renaissance in snowboarding nowadays. Many riders who are getting older do not ride terrain parks anymore and are looking for alternative fun. Videos like the “Yearning for Turning” series from Korua Shapes (a snowboard brand specializing in carving snowboards for soft boots) have also recently popularized carving.
Carving means you ride through the turns only on the edges of your snowboard, leaving a thin line behind you (as opposed to sliding turns).
Check out the following video from Snowboard Addiction to learn the basics.
Certain snowboard setups are better for carving:
- Stiffer, camber-dominant snowboards hold an edge better through the carves.
- Wider snowboards are also better for carving because you typically have less toe and heel overhang. The lower you get in the carve, the closer your toes or heels get to the snow, and you risk a “boot out” — your boot digs into the snow, and the edge loses contact with the snow.
When carving, always pay attention to safety. You are doing wider turns that require more space, so look uphill during your turns.
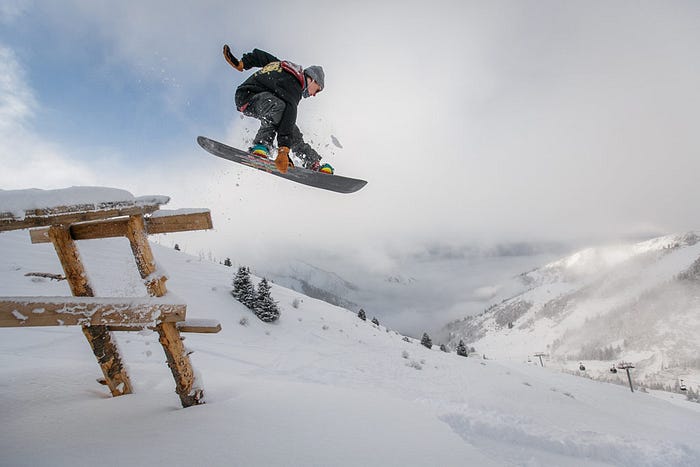
Freestyle
Freestyle snowboarding refers to doing various tricks on a snowboard. You can perform these tricks in various environments:
- Flat ground — the flat surface of the slopes
- Boxes, rails, and other features in a terrain park
- Jumps in the terrain park
- Natural features like side hits, lips, etc., in a resort or free terrain
- Urban features
- Half-pipe or quarter pipe
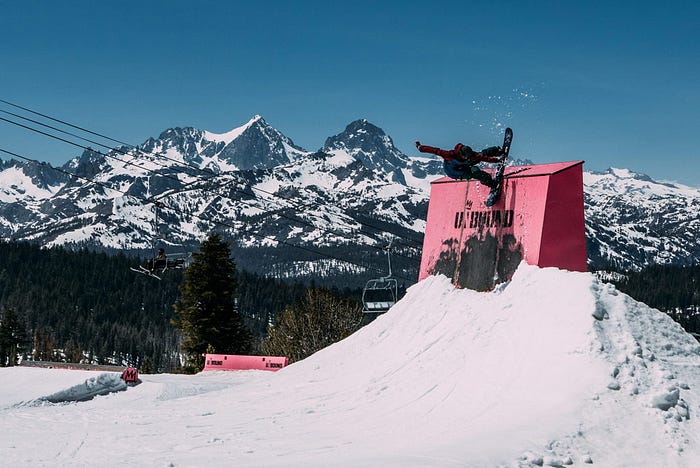
Freestyle is the most creative part of snowboarding and an endless source of inspiration for your progress.
If you’d like to get better at snowboarding, incorporate freestyle early on because it will improve your balance and overall riding competence. Wear additional protective gear if you start with freestyle snowboarding or any time you learn a new trick.
You don’t have to go to a snow park to start with freestyle; you can practice many freestyle tricks on the slope. These are called flat-ground tricks, and the basic one is the ollie.
Ollie
The ollie is the basic freestyle trick and the foundation of many other tricks. You shift your weight over the back leg and load the tail of your snowboard like a spring. Then, pop from it and bring your knees to your chest. It needs to be one fluid motion.
Rotation vs. Counter-Rotation
Before you move on, understand how rotation and counter-rotation work on a snowboard, as they are part of almost all other snowboard tricks.
Check out the separation and anticipation video from SBINZ to learn more about these concepts.
Butters
Butters are fun and stylish flat-ground tricks. They usually involve pressing the nose or tail of your snowboard and spinning around in certain ways (hence the name, because the movement is reminiscent of spreading butter). Buttering is also good preparation for jibbing because many jibbing tricks have their flat-ground counterpart.
Start with the basic buttering position, tail press, and nose press. Some don’t call these butters because they don’t involve spinning, but they are the basic building blocks of all other butter tricks.
Check out Snowboard Addiction’s buttering trick playlist for many variations of butter tricks. You can also check their Buttering Series.
It’s easier to butter on softer snowboards, so if you’re wondering why you may have trouble doing butters on a stiff freeride board, this is likely the reason.
Jumping
Jumping on a snowboard is the next logical progression once you gain more control over your snowboard on flat ground. It can be tempting but also intimidating for beginners — start easy and work your way up through the following Snowboard Addiction tutorials.
Jibbing
Jibbing is the most technical form of freestyle snowboarding. It involves sliding with your snowboard on boxes or handrails. You can slide on these features with your snowboard parallel to them (50–50) or perpendicular (boardslides), or combine them in various ways. You can jump into and out of the features using rotation and counter-rotation and perform presses, creating endless combinations.
Follow along with these tutorials to start your jibbing training.
Off-season training
How do you stay fit or even develop snowboarding skills outside of winter? Here are a few tips:
Snowboard Addiction training products
Snowboard Addiction offers unique training gear for off-season practice — a jib board and balance bar for training jib tricks, and a tramp board for training jumps on the trampoline. You can use them with training bindings.
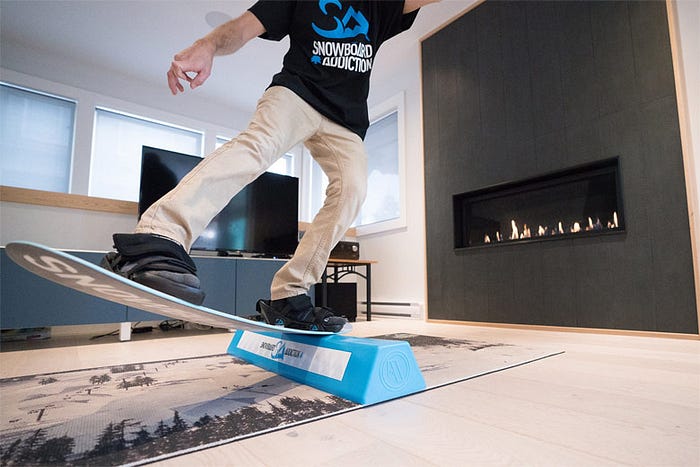

Check out this TJ video if you are looking for a cheaper alternative.
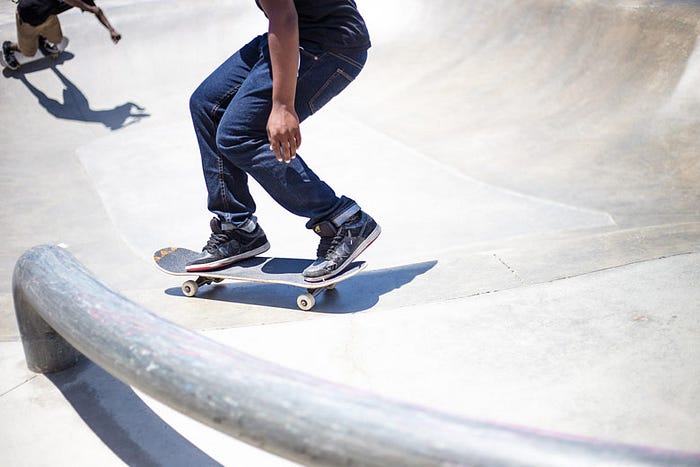
Skateboarding
Skateboarding and snowboarding have much in common — balanced position, sideways movement, and tricks. Many pro snowboarders are also very good skateboarders. Skateboarding is more technical and challenging as it requires you to push to move forward (unless you ride an electric skateboard, of course). It’s an excellent and affordable way to prepare for snowboarding during the summer.
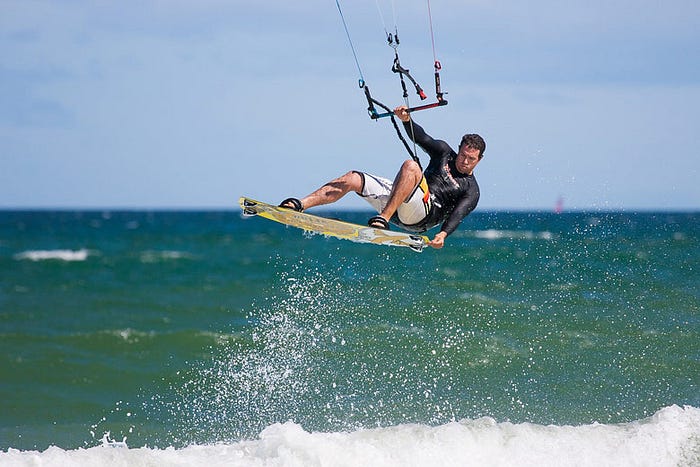
Surfing, wakeboarding, kitesurfing
If you are lucky enough to practice some water board sports related to snowboarding, definitely try them.
Workout
A snowboarding-specific workout should focus on increasing your mobility and flexibility, functional and explosive strength, and endurance of your core muscles and legs. Don’t forget upper body workouts. Examples of training that cover these areas include parkour, street workout, calisthenics, or weight training.
Staying physically active throughout the entire year with any activity (strength training, running, swimming, hiking, cycling) is also good preparation for the snowboarding season, especially as you get older.
Resources
YouTube
Tutorials
- Snowboard Addiction — Snowboard Addiction offers paid tutorials, but their YouTube channel contains many videos with free tutorials and tips.
- Malcolm Moore — quality tutorials from a British snowboarding instructor teaching in Alpe d’Huez, France
- HOW TO XV — tips and tricks for freeride and backcountry riding with Xavier de Le Rue
Reviews
- Angry Snowboarder — a snowboarding veteran with a lot of insight into the snowboarding and snowboarding industry.
- Board Archive — snowboard reviews and vlogs from TJ
- Snowboard Robot
- Tribute Boardshop
Vlogs
Podcasts
Competitions
Pros
If you’d like to see freestyle snowboarding in its top form, check out some of the following channels:
- SHREDBOTS
- Beyond Medals
- Mark McMorris
- Stale Sandbech
- Marcus Kleveland
- Arthur Longo
- Sage Kotsenburg
- Craig McMorris
- Torstein Horgmo
Brands channels
- Arbor
- Bataleon
- Burton Snowboards
- Capita
- DC Shoes
- Jones
- K2
- KORUA Shapes
- Lib Tech
- Nidecker Snowboards
- Nitro
- Ride Snowboards
- Rome
- Signal
- Union
You can follow many snowboarding-related accounts on Instagram, including pro athletes, brand accounts, and snowboarding coaches. Here are some of them:
- Mark McMorris
- Travis Rice
- Marcus Kleveland
- Anna Gasser
- Sage Kotsenburg
- Stale Sandbech
- Sebastien Toutant
- Max Parrot
- Torstein Horgmo
- Danny Davis
- Rene Rinnekangas
- Halldor Helgason
- Elena Hight
- Torah Bright
- Sven Thorgren
- Darcy Sharpe
- Spenny
- Burton Snowboards
- CAPiTA
- DC Snowboarding
- Jones Snowboards
- Nitro Snowboards
- Union Binding Company
- Snowboard Addiction
- Tommie Bennett
Forums
- Snowboarding Forum
- Snowboarding on Reddit
Gear reviews
Online magazines
Online shops
Conclusion
Snowboarding is for everyone, and it’s never too late to start — maybe you will find a new passion in your life.
Snowboarding is also yours. It means that it’s only up to you what form and shape you give to your riding. Take others as inspiration, but find your unique way — there is always space for progress, no matter your current level.
Hopefully, this guide will help you progress faster if you are new to snowboarding or provide fresh perspectives if you already snowboard. If you have any suggestions or questions, post them in the comments.
Happy shredding!
—
Version History
Jul 2024
- Moved the guide to Medium
Nov 2022
- Updated products for the 2022/2023 season
- Replaced certain videos with better examples
- Linked to the new FIS SnowKidz series
- Updated resources
Dec 2021
- Updated products for the 2021/2022 season
- Added new videos with beginner tutorials from PSIA-AASI and Malcolm Moore
- Replaced certain videos with better examples
- Linked to the new buttering series from Snowboard Addiction
- Updated resources
Jan 2021
- Updated products for the 2020/2021 season
- Updated resources; added new YouTube channels
Nov 2019
- New section on adaptive stance
- Updated products for the 2019/2020 season
- Added new videos on snowboard setup and binding adjustment
- Updated videos on finding your stance, powder riding tips, and how to ollie
- Linked a new video on separation and anticipation
- Updated resources; added Instagram accounts
- Added version history
Dec 2018
- The first version of the guide
